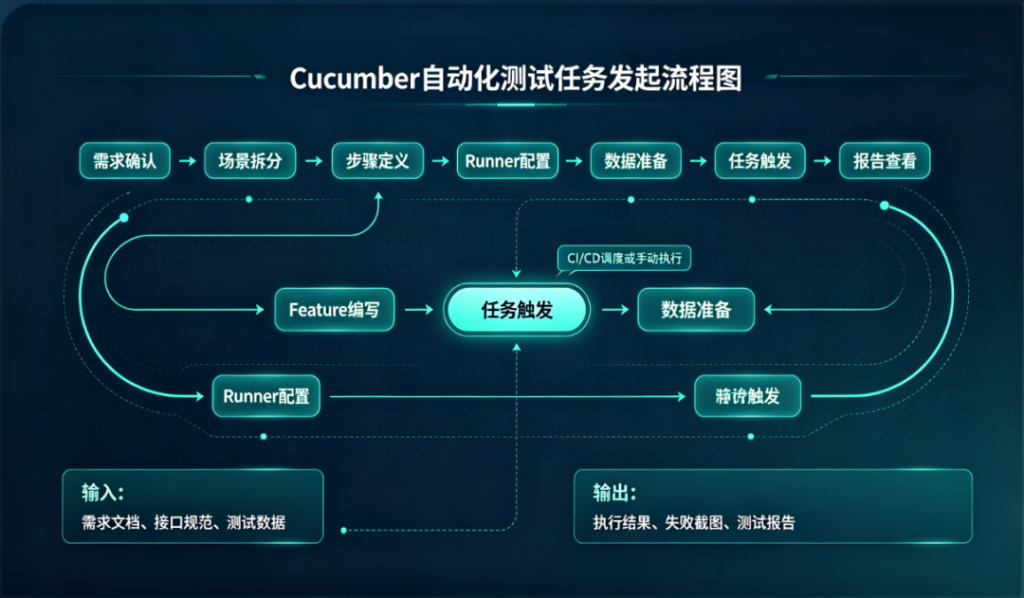
如果你是测试工程师,一定遇到过这样的困扰:GUI自动化测试脚本写好了,但过不了多久页面改个class名,脚本就全挂了;用例写得密密麻麻全是driver.findElement,连产品经理都看不懂;团队协作时,测试用例和代码各写各的,后期维护成本高得吓人。
那么,有没有一种方法能让测试用例像读故事一样清晰,让开发、产品、测试都能参与进来?今天我要介绍的Cucumber就是这样一款工具——它能让你用自然语言写测试用例,同时还能自动执行。
一、为什么选择Cucumber做GUI自动化测试
传统GUI自动化测试的三大困境
在正式开始之前,我们先来聊聊传统GUI自动化测试的痛点。做过Web自动化的朋友都知道,Selenium虽然强大,但随着项目规模扩大,问题会越来越多:
- 脚本难维护
:页面元素一变,几十个测试脚本全要改。某天前端重构了登录页面,你的100个登录用例可能瞬间全部失败。 - 用例难阅读
:传统脚本里充斥着 driver.findElement(By.xpath("//input[@id='username']"))这样的代码,非技术人员根本看不懂,更别说让产品经理参与评审。 - 团队协作差
:测试用例和开发代码分离,需求评审时各说各话,验收标准不统一。
BDD理念带来的变革
这时候,BDD(Behavior Driven Development,行为驱动开发)理念应运而生。BDD的核心思想是:用大家都看得懂的自然语言来描述系统行为,让技术团队和业务团队能够无障碍沟通。
BDD不是要取代传统的自动化测试,而是要解决”测试用例的可读性”和”团队协作”这两个问题。
Cucumber如何解决这些问题
Cucumber是BDD领域最流行的开源工具,它允许你用一种叫做Gherkin的语言来编写测试用例。这种语言使用简单的英文关键字(Given/When/Then),即使你不是程序员,也能轻松理解测试用例的含义。
|
📋 Cucumber测试用例示例 功能: 用户登录系统
场景: 使用正确账号密码登录成功
前提 用户打开登录页面
当 输入用户名 "testuser"
并且 输入密码 "Test123456"
并且 点击登录按钮
那么 应该显示欢迎信息 "欢迎回来,testuser"
场景: 使用错误密码登录失败
前提 用户打开登录页面
当 输入用户名 "testuser"
并且 输入错误密码 "wrongpass"
并且 点击登录按钮
那么 应该显示错误提示 "用户名或密码错误"
|
二、认识Cucumber:核心概念与工作原理
Cucumber是什么
Cucumber是一个支持行为驱动开发(BDD)的测试框架。它的主要特点是用Gherkin语言编写测试用例,用自然语言描述系统的预期行为,然后通过”粘合代码”将这些自然语言描述与实际的技术实现连接起来。
Cucumber最早于2008年诞生于Ruby社区,目前已经支持Java、JavaScript、Python、C#等多种编程语言。在测试领域,Cucumber通常与Selenium、Appium等工具结合使用,用于GUI自动化测试。
核心组件详解
要理解Cucumber,你需要掌握以下三个核心概念:
1. Feature文件
Feature文件是Cucumber测试用例的载体,使用.feature作为文件扩展名。在Feature文件中,你用Gherkin语言描述系统功能,每个功能(Feature)由多个场景(Scenario)组成。
2. Step Definitions
Step Definitions是Java/Python/其他语言的代码,它将Gherkin中的每个步骤(Step)与实际的自动化代码连接起来。比如”点击登录按钮”这个步骤,在Step Definitions中可能对应driver.findElement(By.id("login-btn")).click()。
3. Test Runner
Test Runner是测试运行器,负责启动Cucumber框架,读取Feature文件,匹配Step Definitions,执行测试并生成报告。常用的Runner包括JUnit Runner(Java)和Cucumber CLI。
Cucumber工作流程
理解Cucumber的工作流程很重要,它决定了你在实际项目中如何组织代码:
 图片引自微信公众号,扫码关注阅读原文
具体来说,Cucumber执行测试时会经历以下步骤:
-
读取所有 .feature文件,解析Gherkin语法 -
对于每个场景中的步骤,按顺序查找对应的Step Definitions -
找到匹配的Step Definition后,执行其中的代码 -
所有步骤执行完成后,生成测试报告 -
如果某个步骤找不到对应的Step Definition,测试会失败并报错
三、技术栈全景图
在开始动手之前,我们先了解一下本文将使用的完整技术栈:
🛠️ 技术栈架构图
图片引自微信公众号,扫码关注阅读原文为什么选择这个组合?原因如下:
- Java
:企业级应用最常用的语言,生态成熟,学习资源丰富 - Maven
:优秀的依赖管理工具,一键下载所有依赖 - Selenium WebDriver
:Web自动化领域的事实标准,支持所有主流浏览器 - Cucumber
:BDD框架的领导者,社区活跃,文档完善 - IntelliJ IDEA
:Java开发首选IDE,对Cucumber有良好的语法支持
四、环境准备:从零开始搭建开发环境
现在开始动手搭建环境。我会假设你是从零开始,一步一步详细说明。
4.1 安装JDK
Cucumber和Selenium都需要Java运行环境,所以JDK是必须的。
步骤一:下载JDK
访问Oracle官网或使用OpenJDK,下载JDK 11或更高版本(建议JDK 17):
-
Oracle JDK:https://www.oracle.com/java/technologies/downloads/ -
OpenJDK(免费):https://adoptium.net/
💡 提示
建议下载安装版(.exe或.msi),安装过程会自动配置环境变量,比解压版更省心。
步骤二:配置环境变量
安装完成后,需要配置两个环境变量:
变量名: JAVA_HOME变量值: C:\Program Files\Java\jdk-17变量名: Path(追加)变量值: %JAVA_HOME%\bin
步骤三:验证安装
打开命令提示符(Win+R,输入cmd),输入以下命令验证:
java -version
如果显示类似以下内容,说明JDK安装成功:
java version "17.0.5" 2022-10-18 Java(TM) SE Runtime Environment (build 17.0.5+9) Java HotSpot(TM) 64-Bit Server VM (build 17.0.5+9, mixed mode)
4.2 安装Maven
Maven是Java项目的依赖管理工具,类似于前端的npm。安装Maven后,你不需要手动下载各种jar包,Maven会自动帮你搞定。
步骤一:下载Maven
访问Maven官网下载压缩包:https://maven.apache.org/download.cgi
下载apache-maven-3.9.x-bin.zip,解压到本地目录,比如C:\apache-maven。
步骤二:配置环境变量
变量名: MAVEN_HOME变量值: C:\apache-maven变量名: Path(追加)变量值: %MAVEN_HOME%\bin
步骤三:配置国内镜像(加速下载)
打开Maven安装目录下的conf/settings.xml文件,在<mirrors>标签中添加阿里云镜像:
<mirrors> <mirror> <id>aliyunmaven</id> <mirrorOf>*</mirrorOf> <name>阿里云公共仓库</name> <url>https://maven.aliyun.com/repository/public</url> </mirror> </mirrors>
步骤四:验证安装
mvn -version
成功后会显示Maven版本信息。
4.3 安装IntelliJ IDEA
IntelliJ IDEA是JetBrains公司开发的Java IDE,有Community(免费)和Ultimate(付费)两个版本。对于Cucumber测试开发,Community版本完全够用。
下载地址:https://www.jetbrains.com/idea/download/
💡 提示
安装完成后,记得安装Cucumber相关插件:Cucumber for Java和Gherkin。打开IDEA → File → Settings → Plugins,搜索并安装即可。
五、创建你的第一个Cucumber项目
5.1 方法一:使用IDEA创建Maven项目
这是最简单的方法,推荐新手使用:
-
打开IntelliJ IDEA,选择 File → New → Project -
选择 Maven 作为构建工具 -
填写项目信息:Name(项目名)、Location(存储位置)、JDK -
点击 Create 创建项目
5.2 项目目录结构
创建完成后,你的项目结构应该是这样的:
图片引自微信公众号,扫码关注阅读原文各目录用途说明:
|
|
|
|---|---|
src/test/java/stepdefinitions |
|
src/test/java/runners |
|
src/test/resources/features |
|
pom.xml |
|
5.3 配置文件:pom.xml详解
pom.xml是Maven项目的核心配置文件,定义了项目依赖。以下是Cucumber+Selenium项目的完整配置:
<project xmlns="http://maven.apache.org/POM/4.0.0"xmlns:xsi="http://www.w3.org/2001/XMLSchema-instance"xsi:schemaLocation="http://maven.apache.org/POM/4.0.0http://maven.apache.org/xsd/maven-4.0.0.xsd"><modelVersion>4.0.0</modelVersion><groupId>com.deartester</groupId><artifactId>cucumber-demo</artifactId><version>1.0-SNAPSHOT</version><packaging>jar</packaging><properties><maven.compiler.source>17</maven.compiler.source><maven.compiler.target>17</maven.compiler.target><project.build.sourceEncoding>UTF-8</project.build.sourceEncoding><cucumber.version>7.14.0</cucumber.version><selenium.version>4.12.0</selenium.version></properties><dependencies><!-- Cucumber Core --><dependency><groupId>io.cucumber</groupId><artifactId>cucumber-java</artifactId><version>${cucumber.version}</version></dependency><!-- Cucumber JUnit --><dependency><groupId>io.cucumber</groupId><artifactId>cucumber-junit</artifactId><version>${cucumber.version}</version><scope>test</scope></dependency><!-- Selenium WebDriver --><dependency><groupId>org.seleniumhq.selenium</groupId><artifactId>selenium-java</artifactId><version>${selenium.version}</version></dependency><!-- JUnit --><dependency><groupId>io.cucumber</groupId><artifactId>cucumber-junit</artifactId><version>${cucumber.version}</version></dependency></dependencies><build><plugins><plugin><groupId>org.apache.maven.plugins</groupId><artifactId>maven-surefire-plugin</artifactId><version>3.0.0-M9</version></plugin></plugins></build></project>
依赖说明:
- cucumber-java
:Cucumber的核心库,提供Gherkin解析和Step匹配功能 - cucumber-junit
:Cucumber与JUnit的集成,允许用JUnit Runner运行Cucumber测试 - selenium-java
:Selenium WebDriver的Java客户端,用于浏览器自动化 - junit
:JUnit测试框架,Cucumber依赖它来运行测试
六、第一个测试场景:完整的登录功能测试
现在我们开始编写第一个完整的Cucumber测试用例——登录功能测试。
6.1 编写Feature文件
在src/test/resources/features目录下创建login.feature文件:
@login @smoke功能: 用户登录系统作为网站的注册用户我希望能够使用用户名和密码登录以便访问我的个人账户背景:假设 用户未登录@success场景大纲: 使用正确的账号密码登录当 输入用户名 "{username}"并且 输入密码 "{password}"并且 点击登录按钮那么 应该显示欢迎信息 "欢迎回来,{username}"例子:| username | password || testuser | Test123456 || admin | Admin@2024 |@failure场景: 使用错误密码登录失败当 输入用户名 "testuser"并且 输入错误密码 "wrongpass"并且 点击登录按钮那么 应该显示错误提示 "用户名或密码错误"并且 保持登录页面@empty场景: 用户名为空时登录失败当 输入用户名为空并且 输入密码 "Test123456"并且 点击登录按钮那么 应该显示错误提示 "请输入用户名"
6.2 Gherkin语法详解
让我解释一下上面用到的Gherkin关键字:
|
|
|
|
|---|---|---|
功能 |
|
|
场景 |
|
|
场景大纲 |
|
|
例子 |
|
|
假设 |
|
|
当 |
|
|
那么 |
|
|
并且 |
|
|
但是 |
|
|
背景 |
|
|
💡 命名建议
Gherkin关键字后面紧跟的内容就是步骤描述。建议使用中文描述,这样团队成员更容易理解。关键字(功能、场景等)也要用中文。
6.3 编写Step Definitions
Step Definitions是将Gherkin步骤与实际代码连接起来的”桥梁”。在stepdefinitions目录下创建LoginSteps.java:
package stepdefinitions;import io.cucumber.java.zh_cn.*;import org.junit.Assert;import org.openqa.selenium.By;import org.openqa.selenium.WebDriver;import org.openqa.selenium.chrome.ChromeDriver;import org.openqa.selenium.support.ui.ExpectedConditions;import org.openqa.selenium.support.ui.WebDriverWait;import java.time.Duration;public class LoginSteps {private WebDriver driver;private WebDriverWait wait;// 共享状态:通过Context类传递测试数据private TestContext context;public LoginSteps(TestContext context) {this.context = context;this.driver = context.driver;this.wait = new WebDriverWait(driver, Duration.ofSeconds(10));}@假设("用户未登录")public void 用户未登录() {// 打开登录页面driver.get("https://demo.test.com/login");}@当("输入用户名 {string}")public void 输入用户名(String username) {WebElement usernameInput = wait.until(ExpectedConditions.presenceOfElementLocated(By.id("username")));usernameInput.clear();usernameInput.sendKeys(username);}@当("输入用户名为空")public void 输入用户名为空() {WebElement usernameInput = wait.until(ExpectedConditions.presenceOfElementLocated(By.id("username")));usernameInput.clear();}@当("输入密码 {string}")public void 输入密码(String password) {WebElement passwordInput = driver.findElement(By.id("password"));passwordInput.clear();passwordInput.sendKeys(password);}@当("输入错误密码 {string}")public void 输入错误密码(String password) {输入密码(password);}@当("点击登录按钮")public void 点击登录按钮() {WebElement loginBtn = driver.findElement(By.id("login-btn"));loginBtn.click();}@那么("应该显示欢迎信息 {string}")public void 应该显示欢迎信息(String expectedMessage) {WebElement welcomeMsg = wait.until(ExpectedConditions.presenceOfElementLocated(By.cssSelector(".welcome-message")));String actualMessage = welcomeMsg.getText();Assert.assertEquals("欢迎信息不匹配", expectedMessage, actualMessage);}@那么("应该显示错误提示 {string}")public void 应该显示错误提示(String expectedError) {WebElement errorMsg = wait.until(ExpectedConditions.presenceOfElementLocated(By.cssSelector(".error-message")));String actualError = errorMsg.getText();Assert.assertEquals("错误提示不匹配", expectedError, actualError);}@那么("保持登录页面")public void 保持登录页面() {String currentUrl = driver.getCurrentUrl();Assert.assertTrue("应该仍在登录页面", currentUrl.contains("/login"));}}
6.4 编写Test Runner
Test Runner用于启动Cucumber测试。在runners目录下创建TestRunner.java:
package runners;import io.cucumber.junit.Cucumber;import io.cucumber.junit.CucumberOptions;import org.junit.runner.RunWith;(Cucumber.class)(features = "src/test/resources/features", // Feature文件路径glue = {"stepdefinitions", "hooks"}, // Step Definitions包路径plugin = {"pretty", // 彩色输出"html:target/cucumber-reports.html", // HTML报告"json:target/cucumber-reports.json", // JSON报告"junit:target/cucumber-reports.xml" // JUnit XML报告},tags = "@smoke", // 只运行带@smoke标签的测试monochrome = false // 彩色控制台输出)public class TestRunner {// 测试运行器配置类,不需要写任何代码}
6.5 编写Hooks(钩子函数)
Hooks用于在测试场景执行前后执行一些公共操作,比如打开/关闭浏览器。创建hooks/Hooks.java:
package hooks;import io.cucumber.java.After;import io.cucumber.java.Before;import io.cucumber.java.Scenario;import org.openqa.selenium.OutputType;import org.openqa.selenium.TakesScreenshot;import org.openqa.selenium.WebDriver;import org.openqa.selenium.chrome.ChromeDriver;import org.openqa.selenium.chrome.ChromeOptions;import java.time.Duration;public class Hooks {public static WebDriver driver;public void setUp() {// 配置Chrome选项ChromeOptions options = new ChromeOptions();options.addArguments("--start-maximized");options.addArguments("--disable-notifications");// 初始化WebDriverdriver = new ChromeDriver(options);driver.manage().timeouts().implicitlyWait(Duration.ofSeconds(10));driver.manage().window().maximize();}public void tearDown(Scenario scenario) {// 如果测试失败,截取屏幕截图if (scenario.isFailed()) {TakesScreenshot screenshot = (TakesScreenshot) driver;byte[] screenshotBytes = screenshot.getScreenshotAs(OutputType.BYTES);scenario.attach(screenshotBytes, "image/png", "失败截图");}// 关闭浏览器if (driver != null) {driver.quit();}}}
mvn test # 运行所有测试
mvn test -Dcucumber.filter.tags="@smoke" # 运行带特定标签的测试
mvn test -Dcucumber.features="src/test/resources/features/login.feature" # 运行特定功能文件
查看测试报告
测试完成后,在项目根目录下会生成测试报告:
target/cucumber-reports.html
:HTML格式报告,用浏览器打开即可查看 target/cucumber-reports.json
:JSON格式,可用于CI/CD集成 target/cucumber-reports.xml
:JUnit XML格式,Jenkins等CI工具可识别
图片引自微信公众号,扫码关注阅读原文七、进阶技能一:数据驱动测试
在真实项目中,我们经常需要对同一功能用不同的数据进行测试。Cucumber提供了Scenario Outline(场景大纲)来实现数据驱动。
7.1 使用Scenario Outline
假设我们要测试用户注册功能,需要测试多种注册场景:
@register功能: 用户注册@valid场景大纲: 验证不同邮箱格式当 输入邮箱 "{email}"并且 输入用户名 "testuser"并且 输入密码 "Test123456"并且 点击注册按钮那么 注册状态应为 "{expected}"例子:| email | expected || test@example.com | 成功 || user.name@domain.com | 成功 || user_name@sub.domain.cn| 成功 |@invalid场景大纲: 验证无效邮箱格式当 输入邮箱 "{email}"那么 邮箱验证提示应为 "{expected}"例子:| email | expected || invalid | 邮箱格式不正确 || @nodomain.com | 邮箱格式不正确 || user@ | 邮箱格式不正确 |
7.2 从Excel读取测试数据
对于更复杂的数据场景,可以从Excel或CSV文件读取测试数据:
public User registerUser(Map<String, String> row) {return new User(row.get("username"),row.get("email"),row.get("password"),row.get("role"));}@当("使用以下用户数据注册")public void 使用以下用户数据注册(List<User> users) {for (User user : users) {inputUsername(user.getUsername());inputEmail(user.getEmail());inputPassword(user.getPassword());clickRegisterButton();verifyRegistration(user.getExpectedResult());}}
八、进阶技能二:Tags与测试组织
8.1 Tags的使用
Tags(标签)用于对测试用例进行分类,方便选择性运行:
@login @smoke @regression
场景: 用户登录成功 ...
@login @regression
场景: 登录失败的各种情况 ...
@register @smoke
场景: 用户注册功能 ...
|
8.2 按Tag运行测试
# 运行smoke测试mvn test -Dcucumber.filter.tags="@smoke"# 运行smoke AND regressionmvn test -Dcucumber.filter.tags="@smoke and @regression"# 运行smoke OR regressionmvn test -Dcucumber.filter.tags="@smoke or @regression"# 排除某个标签mvn test -Dcucumber.filter.tags="not @wip"
8.3 Hooks的多种用法
public class AdvancedHooks {// 全局Before,所有场景执行前运行public void beforeScenario() {System.out.println("场景开始执行");}// 带Tag的Before,只有带对应Tag的场景才执行("@api")public void beforeApiScenario() {// 初始化API测试环境}// 带Tag的After("@screenshot")public void takeScreenshot(Scenario scenario) {if (scenario.isFailed()) {// 截图保存}}// BeforeStep和AfterSteppublic void beforeStep(Scenario scenario) {System.out.println("准备执行步骤: " + scenario.getName());}public void afterStep(Scenario scenario) {if (scenario.isFailed()) {// 记录失败步骤}}}
九、元素定位策略:稳定定位的七大法则
元素定位是GUI自动化的核心技能。以下是经过实践验证的定位策略:
法则一:ID优先原则
ID是最稳定且最快的定位方式。如果页面元素有ID,优先使用ID:
driver.findElement(By.id("username"));
法则二:避免绝对XPath
绝对XPath(如/html/body/div[2]/form/input[1])非常脆弱,页面稍有变化就会失效。
⚠️ 避免使用
// ❌ 绝对XPath - 极其脆弱 /html/body/div[2]/form/input[1]
// ❌ 索引XPath - 容易失效 //div[@class='form']/input[1]
法则三:CSS Selector vs XPath
对于大多数场景,CSS Selector比XPath更快、更稳定:
// ✅ CSS Selector - 推荐By.cssSelector("#username")By.cssSelector(".login-form .btn-primary")By.cssSelector("input[name='username']")// ✅ 相对XPath - 可接受By.xpath("//input[@id='username']")By.xpath("//form[@id='login']//button")
法则四:动态元素处理
对于动态加载的元素,使用显式等待:
// 等待元素可见WebDriverWait wait = new WebDriverWait(driver, Duration.ofSeconds(10));WebElement element = wait.until(ExpectedConditions.visibilityOfElementLocated(By.id("dynamic-content")));// 等待元素可点击wait.until(ExpectedConditions.elementToBeClickable(By.id("submit-btn")));// 等待元素包含特定文本wait.until(ExpectedConditions.textToBePresentInElement(By.className("status"), "Success"));
法则五:iframe切换
如果元素在iframe中,需要先切换到iframe:
// 通过ID或Name切换driver.switchTo().frame("iframe-id");// 通过WebElement切换WebElement iframe = driver.findElement(By.cssSelector("#content-frame"));driver.switchTo().frame(iframe);// 切换回主文档driver.switchTo().defaultContent();
法则六:新窗口处理
// 获取当前窗口句柄String mainWindow = driver.getWindowHandle();// 点击打开新窗口的元素driver.findElement(By.linkText("新窗口链接")).click();// 切换到新窗口for (String windowHandle : driver.getWindowHandles()) {if (!windowHandle.equals(mainWindow)) {driver.switchTo().window(windowHandle);break;}}// 操作新窗口内容driver.findElement(By.id("new-window-content")).sendKeys("test");// 关闭新窗口并切换回主窗口driver.close();driver.switchTo().window(mainWindow);
法则七:等待策略总结
|
|
|
|
|---|---|---|
|
|
|
|
|
|
|
|
|
|
|
|
十、项目结构最佳实践
10.1 Page Object Model模式
Page Object Model(POM)是GUI自动化测试的最佳实践,它将页面元素和操作封装到独立的类中:
/*** 登录页面对象*/public class LoginPage {private WebDriver driver;// 页面元素(私有)private By usernameInput = By.id("username");private By passwordInput = By.id("password");private By loginButton = By.id("login-btn");private By errorMessage = By.cssSelector(".error-message");private By welcomeMessage = By.cssSelector(".welcome-message");// 构造函数public LoginPage(WebDriver driver) {this.driver = driver;}// 页面操作方法(公有)public void inputUsername(String username) {driver.findElement(usernameInput).clear();driver.findElement(usernameInput).sendKeys(username);}public void inputPassword(String password) {driver.findElement(passwordInput).clear();driver.findElement(passwordInput).sendKeys(password);}public void clickLogin() {driver.findElement(loginButton).click();}public String getErrorMessage() {return driver.findElement(errorMessage).getText();}public String getWelcomeMessage() {return driver.findElement(welcomeMessage).getText();}// 组合操作(页面级方法)public void login(String username, String password) {inputUsername(username);inputPassword(password);clickLogin();}}
10.2 完整项目目录结构
图片引自微信公众号,扫码关注阅读原文十一、常见问题与解决方案
问题一:元素找不到(NoSuchElementException)
⚠️ 常见原因
|
// ❌ 错误的等待方式driver.findElement(By.id("content")).click(); // 直接查找,可能找不到// ✅ 正确的等待方式WebDriverWait wait = new WebDriverWait(driver, Duration.ofSeconds(10));wait.until(ExpectedConditions.elementToBeClickable(By.id("content"))).click();
问题二:中文编码问题
<!-- pom.xml中指定UTF-8编码 --><properties><project.build.sourceEncoding>UTF-8</project.build.sourceEncoding></properties><!-- IDEA中设置文件编码:File → Settings → Editor → File Encodings -->
问题三:CI/CD集成(Jenkins)
# Jenkinsfile中使用Maven运行测试pipeline {agent anystages {stage('Run Cucumber Tests') {steps {bat 'mvn test -Dcucumber.filter.tags="@regression"'}post {always {junit 'target/surefire-reports/*.xml'cucumber buildStatus: 'FAILURE',reportTitle: 'Cucumber Test Report',fileIncludePattern: '**/cucumber-reports.json'}}}}}
十二、学习路径与资源推荐
学习路径建议
图片引自微信公众号,扫码关注阅读原文第一阶段(1-2周):完成本教程所有示例,理解Gherkin语法和Step Definitions编写
第二阶段(2-4周):尝试用Cucumber实现自己的项目,熟悉Selenium各种操作
第三阶段(1-2周):集成Jenkins实现自动化运行,学会生成和查看测试报告
第四阶段(持续):封装自己的测试框架,引入设计模式,团队协作优化
推荐学习资源
总结
通过本教程,你应该已经掌握了以下核心技能:
-
✅ 理解Cucumber和BDD的核心概念 -
✅ 搭建完整的Cucumber+Selenium开发环境 -
✅ 编写Gherkin格式的Feature文件 -
✅ 编写Step Definitions连接代码与业务描述 -
✅ 使用Hooks管理测试生命周期 -
✅ 使用Tags组织和管理测试用例 -
✅ 掌握数据驱动测试方法 -
✅ 了解Page Object Model最佳实践
📌 核心要点回顾
Cucumber的价值不在于它比Selenium更强大,而在于它让测试用例变得可读、可协作、可维护。用自然语言写测试,让团队成员都能参与进来,这才是BDD的真正意义。
记住:工具只是手段,提高测试效率、保证软件质量才是目的。祝你在GUI自动化测试的道路上越走越远!